How to Use Mis Naves App
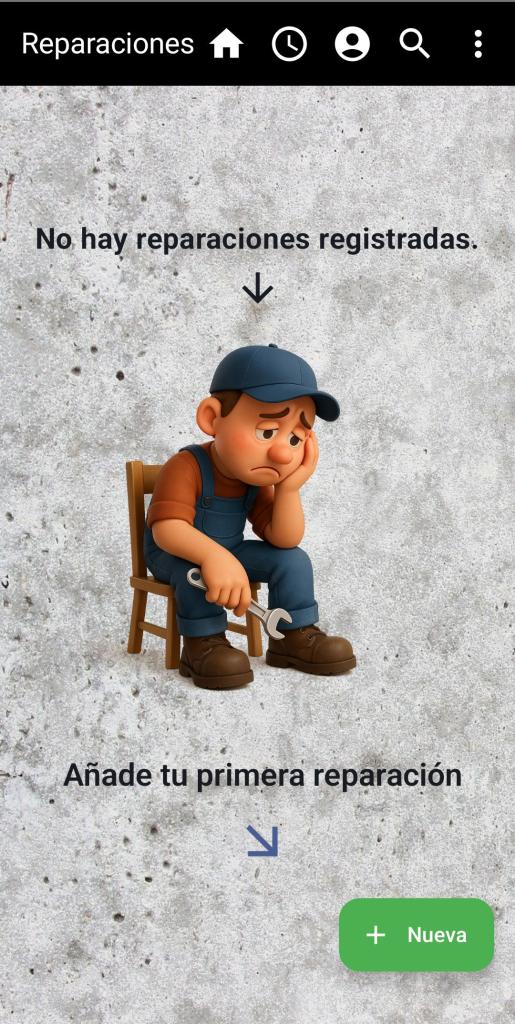
When you enter, this screen will appear so you can add your repairs, but before that, you must add a car to continue, which we’ll do in the Profile section.
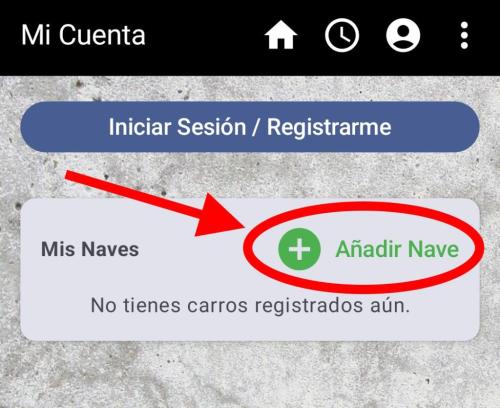
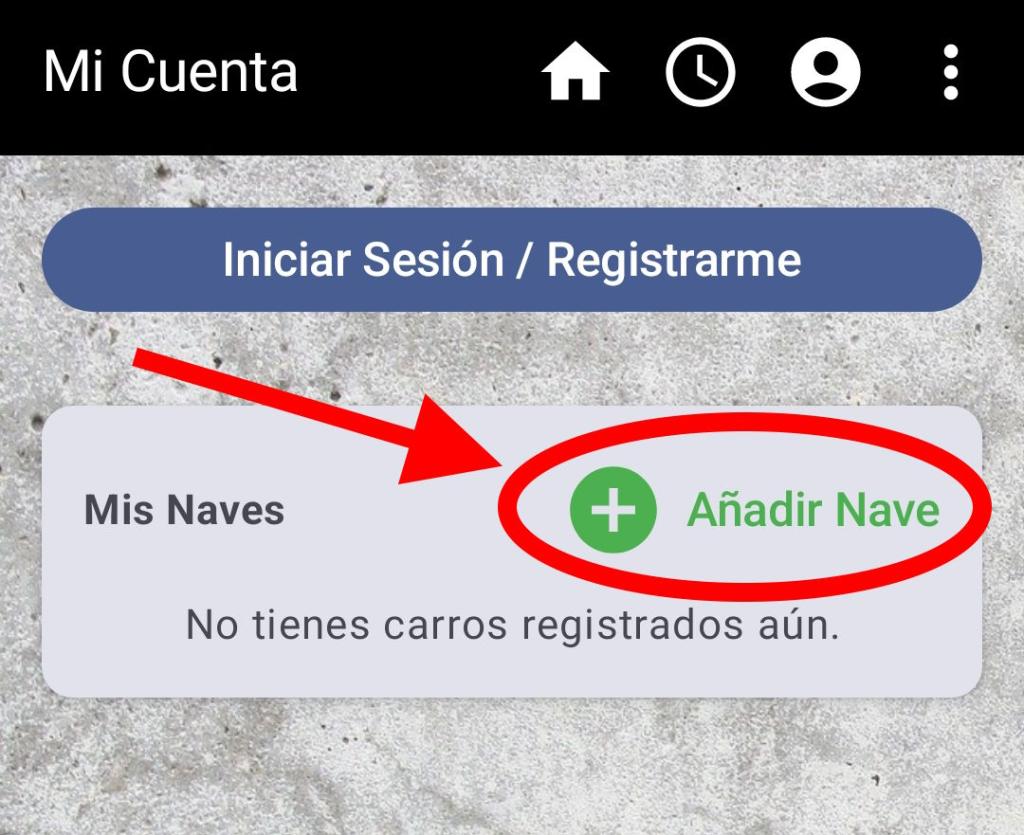
On the Profile screen, select Add.
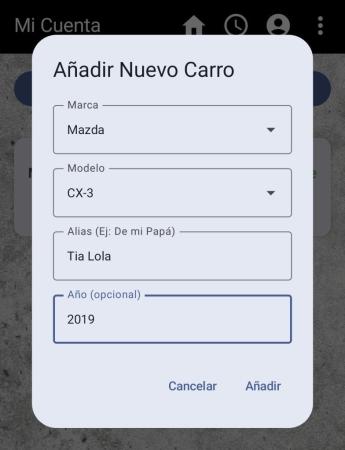
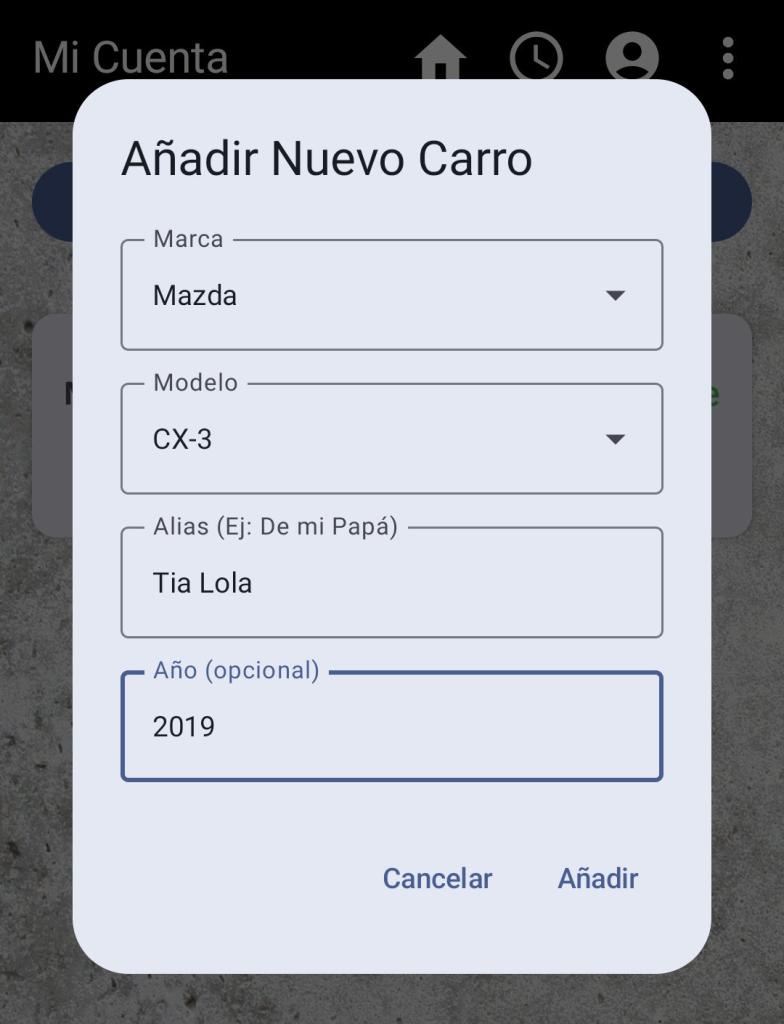
Fill in the required fields. Keep in mind that Brand, Model, and Alias are mandatory. The Alias field helps identify who the car belongs to, or serves as a label if you have two identical cars.
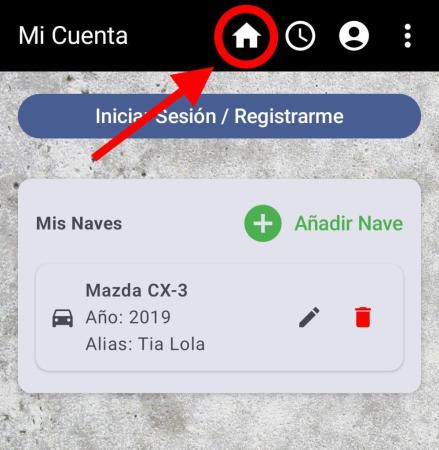
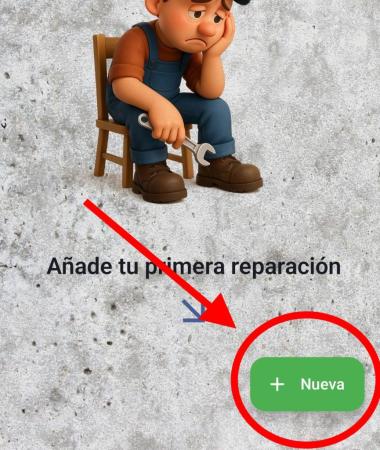
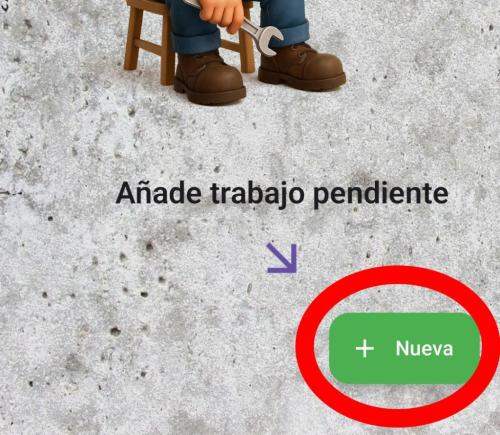
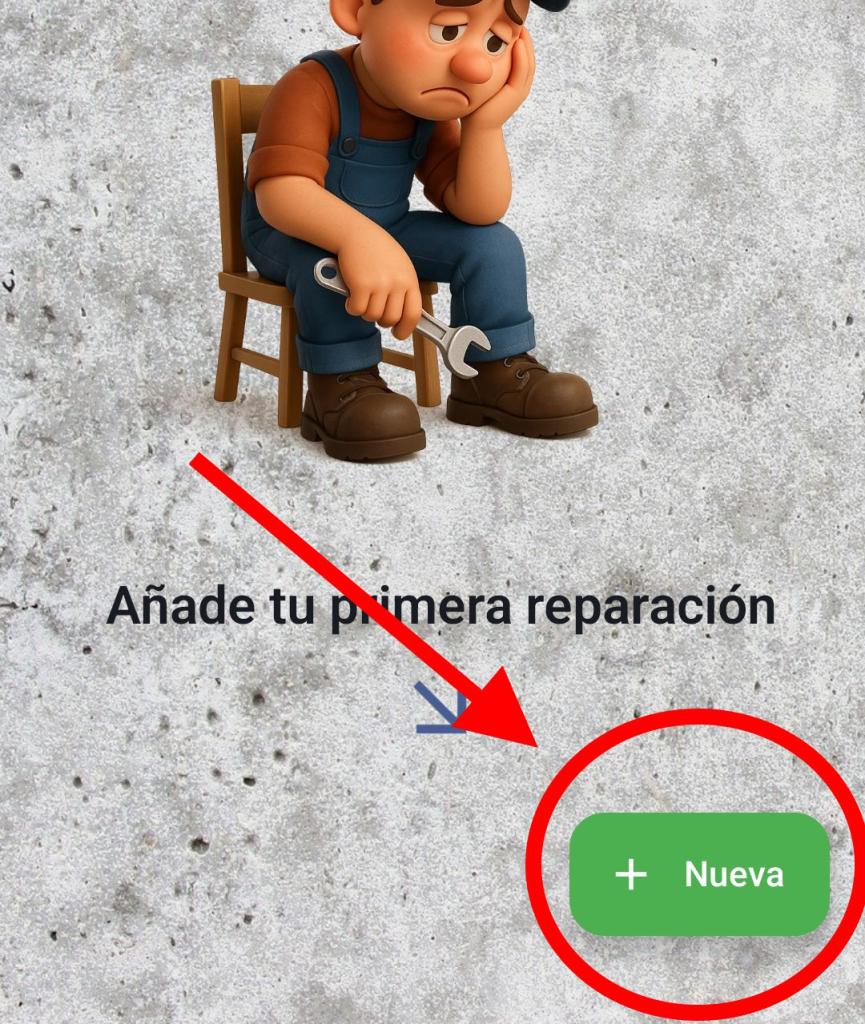
Once the car has been added, you can start adding repairs on the main screen by pressing the “+New” button.
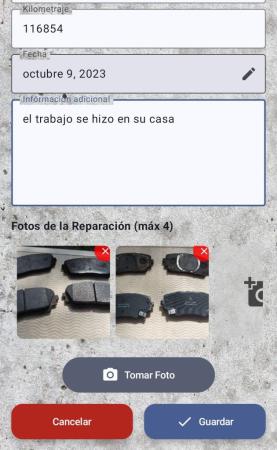
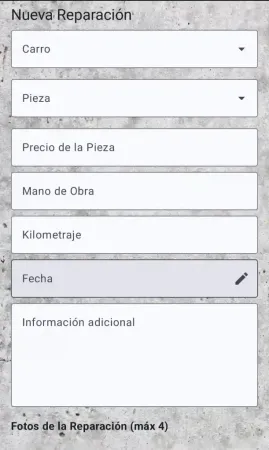
Fill in the necessary fields for the repair that was done or that you performed. You can add up to 4 photos.
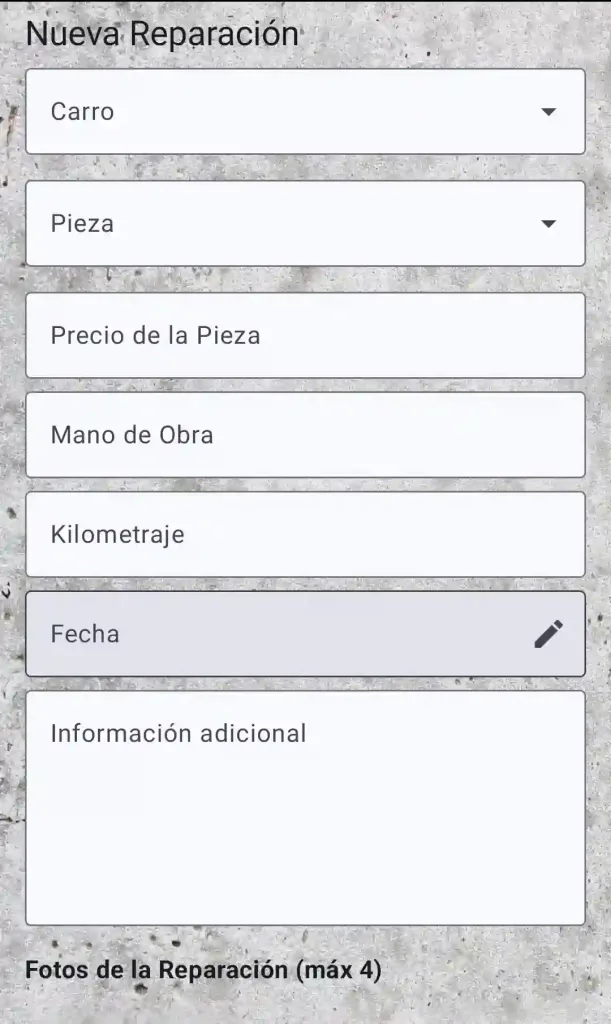
- Please note that these photos are stored on your mobile device and will remain there until you delete them.
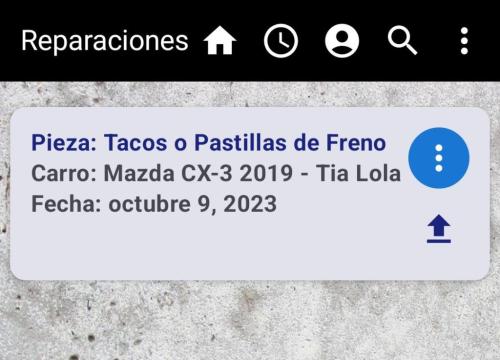
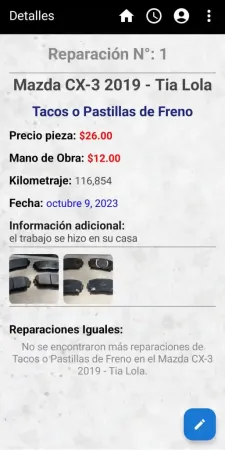
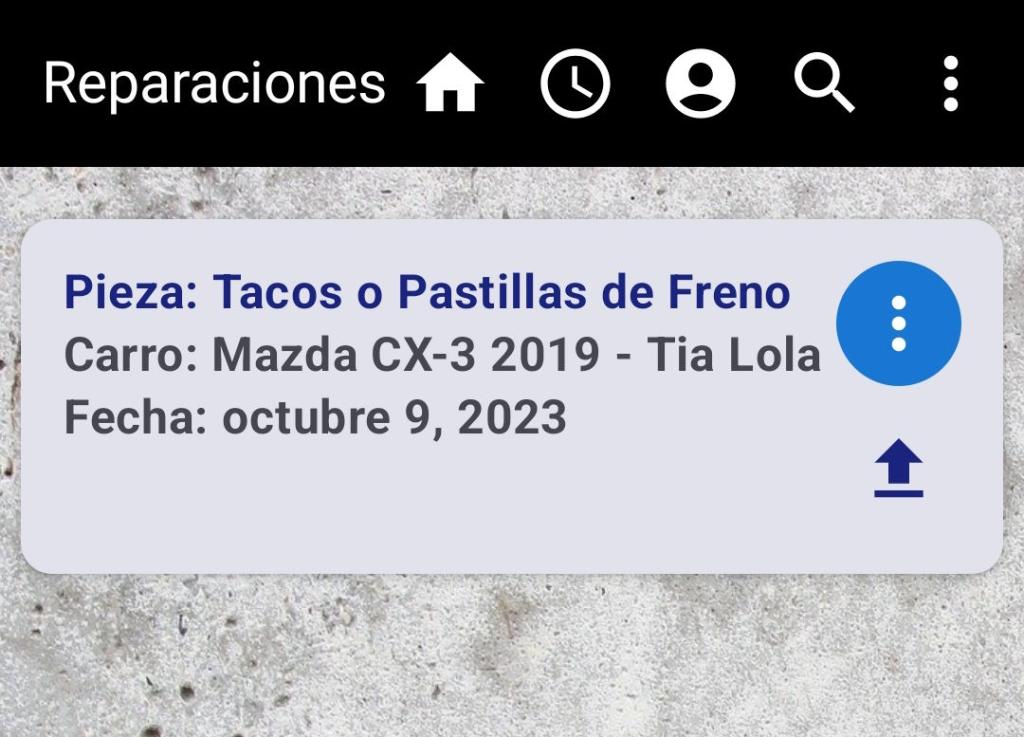
You can then view the repair details by tapping on it from the main screen.

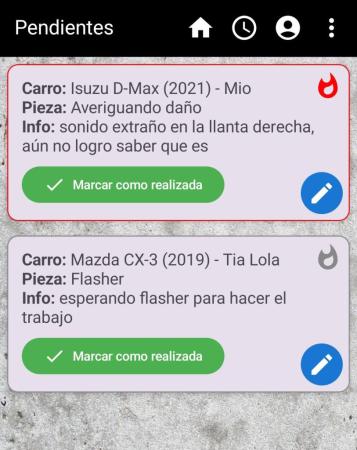
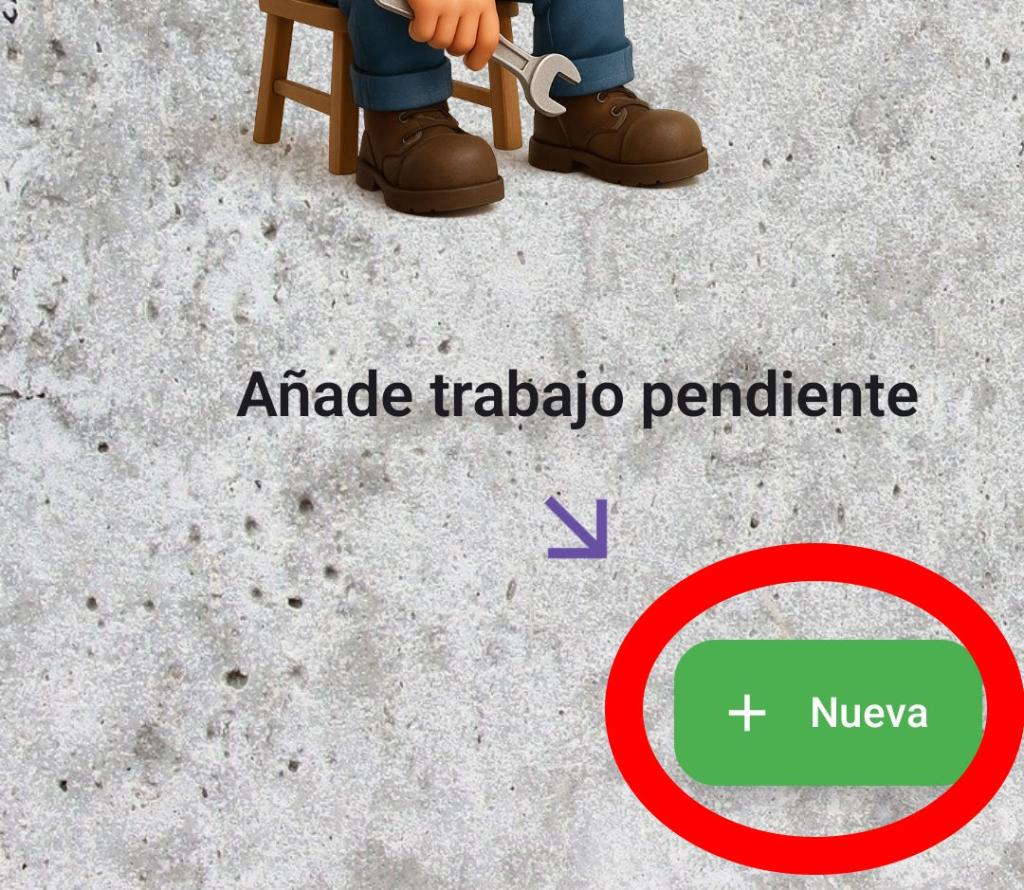
You can also add pending repairs — jobs that need to be done on the car but, for some reason, haven’t been completed yet. Keep this waiting list so you don’t forget them.


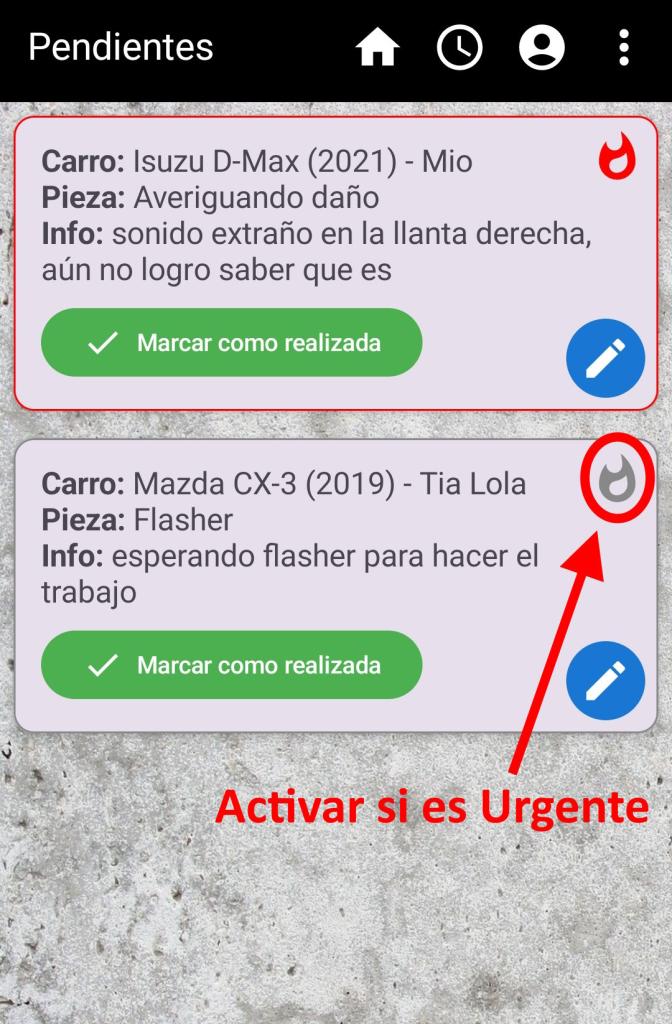
Later, you’ll have a list of pending repairs. Each repair has the option “Mark as done”, so when the work is completed, just press the button and the repair will move to the Completed list on the main screen.
-
Once a repair is moved to the Completed list, it cannot be sent back to Pending.
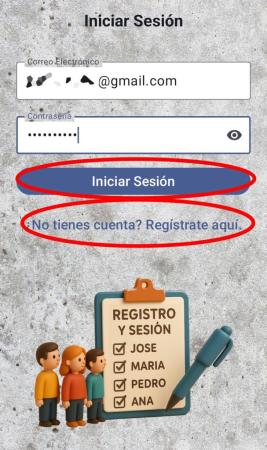
You can register and log in — this is in case you want to sync your repairs with the server so you don’t lose them if your device is lost or replaced.

If you’ve changed devices, you can recover all your repairs and cars by pressing the Backup button. This will restore all your data exactly as it was before.
-
Cars with registered repairs cannot be deleted.

Thank you for reading this far. We hope you enjoy the app — we’ll keep working to improve your experience.